Tagging events
Difficulty level
Mid-level / Advanced
Duration
10 min read
Tagging events
Overview
In this tutorial we will go over advanced tagging in tiim.io. This feature aims to simplify the process of creating and tagging clips in bulk, making it more efficient for users. Using advanced tags is a process and we will be going over all the necessary steps to fully use its capabilities.
Advanced tags is used to create clips with approriate tags in bulk. Adding tags to your clips is really simple. We will get to creating the tags later but basically you can have two different types of tags for a clip. Actions and metadata. Actions are the core of the clip, what happens in it, while metadata adds information and context.
Step by step
Planning events
Planning events is the first step of the process. You need to plan what kind of clips you want to extract from the game. This could include actions such as, offense/defense, shot or posession lost. These actions will be later used as buttons or hotkeys to start clip creation while analysing.
Planning metadata
The second step is planning the metadata. In this step you need to plan what kind of tags you might want to tag your clips with. Good examples could be, off target, on target, blocked or goal. With metadata you can categorise clips with ease and later filter them.
Creating tag groups
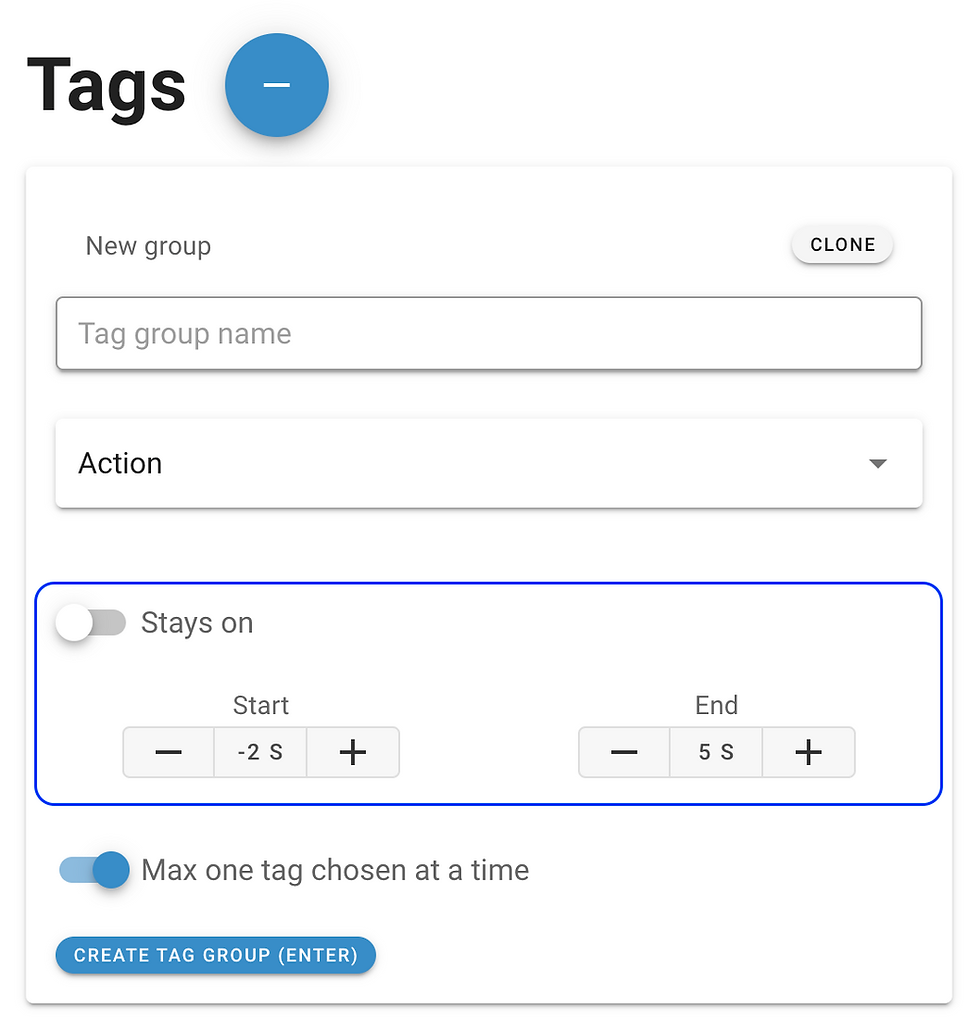
After all the planning is complete we can start creating the tag groups that are used in the tagging process. Head over to the tags section in tiimi.io. Here begin with selecting "create tag group" from the big blue button.

When creating new tag groups it is important to name the group descriptively. It is also important to select the right type of tag for the group. As mentioned before there are two types of tags. Actions and metadata.

Once the name and type of tags have been chosen there are a few things to take note of. While action is selected as the type, "stays on" button will be visible. With this button you can determine the length of the clips you want to create. When not active, the clips you create will be automatically created the length you choose from below. Or when activated you can manually while creating clips choose the start and end for a clip.

Last thing to note when creating tag groups is the option to choose only one or more tags at the same time while creating clips. When activated you can only use one tag from the group per clip. This is recommended for action type tag groups.

Creating tags
Once you have created a tag group you can start adding tags in to it. You need to select the desired tag group and press the "+" button next to the tag group name.

This will open a menu where you can name and customise the tag. You can add hotkeys and map colours to the tag. Hotkeys streamline the analysation and with different map colours you can easily visualise events on a map.

Analysation
Once all the planning and tags are in order it's time to analyse. Advanced tagging can be found in the tagging section while viewing a video.

In the tagging page you can see all the tags and tag groups you have active in the tags section. You can quickly hide and show tags by clicking on the eye symbol, or in the tags section. Hidden tags are shown at the bottom and can be easily activated again.

Now it's time to start creating clips. Creating clips is done by using the action tags. Begin your clip simply by pressing the desired action or using a hotkey you set for it. Closing the clip happens when you press the same action again. If an action is pressed rightclicking will cancel the selection.
Adding metadata to your clips can be done by selecting the desired metadata while an action is active. When closing a clip all the metadata selected will be automatically added to the clip as tags. If only one action is active you can add multiple metadata tags at once by dragging them on to the action tag.

Map points also follow this principle. Select the accurate point on the map and once you close the clip the map point will be shown with the clip.